世間で一昔前から、iPhoneやAndroidで顔検出するアプリが結構リリースされいます。
今更ながら、どのような方法で顔を検出しているのか気になったので、調査してみました。
今回はiPhoneでの顔検出について記載します。
実はiOS5からCIDetectorというクラスが利用できるようになっているらしく、それを利用することによって、画像の中の顔の座標を検出できます。
簡単なサンプルアプリを作成してみました。
まずは、完成イメージ。
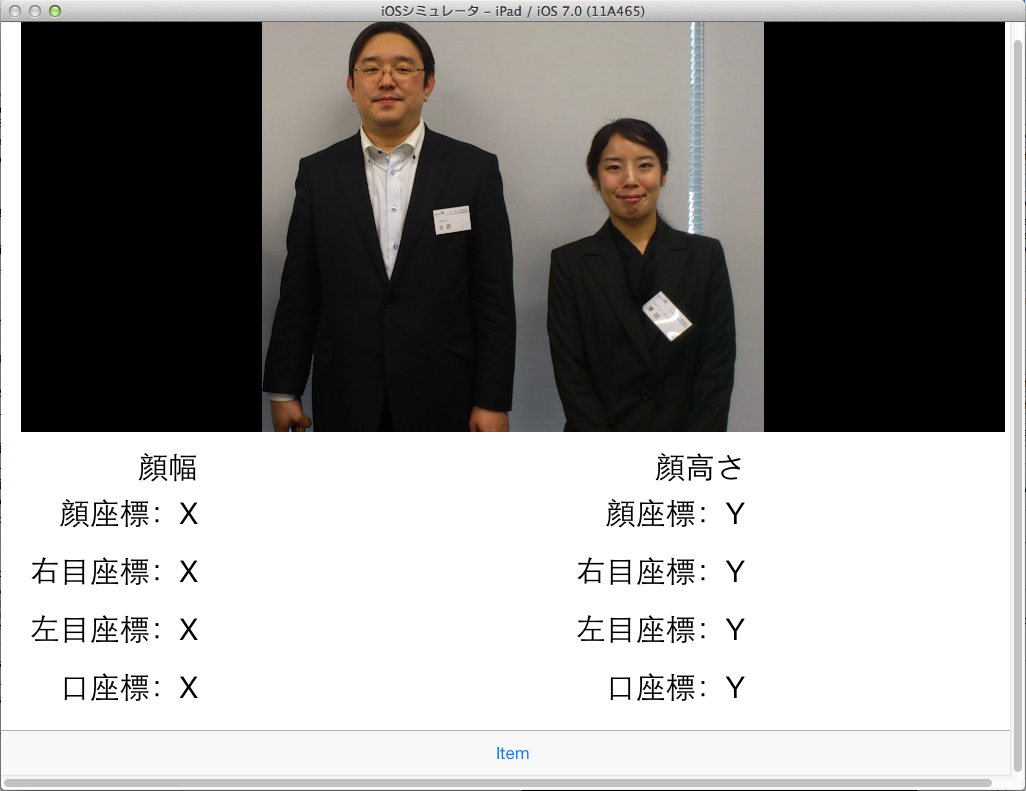
画面下部に顔検出で取得した顔のパーツの座標を表示するエリアがあります。
画面最下部にはボタンを配置し、タップすることで画像の切替・顔検出メソッド呼び出しを行います。
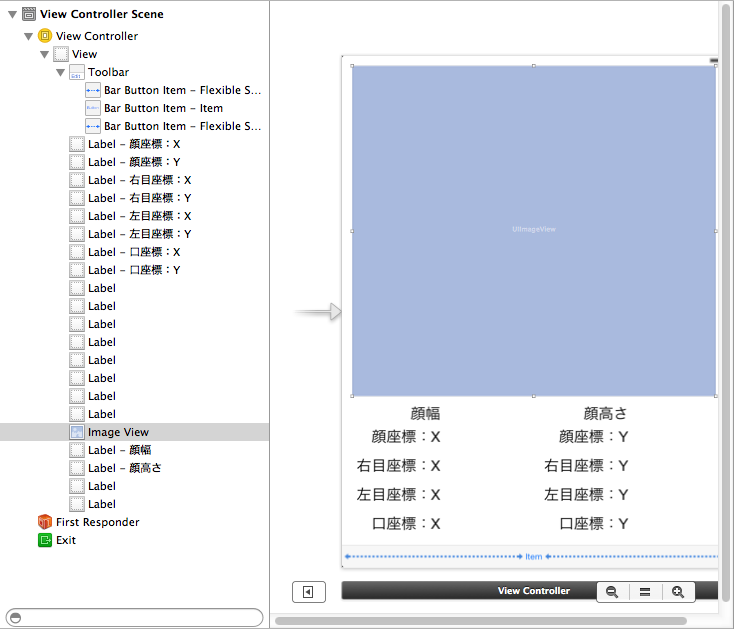
では、MainStoryBoard
ViewController.hは以下のような感じにしました。
#import

@interface ViewController : UIViewController {
int hoge;
}
@property (weak, nonatomic) IBOutlet UIImageView *imageView;
@property (weak, nonatomic) IBOutlet UILabel *labelFaceX;
@property (weak, nonatomic) IBOutlet UILabel *labelFaceY;
@property (weak, nonatomic) IBOutlet UILabel *labelRightEyeX;
@property (weak, nonatomic) IBOutlet UILabel *labelRightEyeY;
@property (weak, nonatomic) IBOutlet UILabel *labelLeftEyeX;
@property (weak, nonatomic) IBOutlet UILabel *labelLeftEyeY;
@property (weak, nonatomic) IBOutlet UILabel *labelMouthX;
@property (weak, nonatomic) IBOutlet UILabel *labelMouthY;
@property (weak, nonatomic) IBOutlet UILabel *labelFaceWidth;
@property (weak, nonatomic) IBOutlet UILabel *labelFaceHeight;

- (IBAction)onClickButtonPicture:(id)sender;

- (void)faceDetect:(UIImage*)image;

@end
6行目から16行目で、アプリで利用する各パーツを宣言しています。
18行目のonClickButtonPictureが画面最下部のボタンタップ時の処理です。
20行目のfaceDetectで顔検出を行います。
ViewController.mは以下のような感じです。
#import "ViewController.h"
#import
#import

@interface ViewController ()

@end

@implementation ViewController

- (void)viewDidLoad
{
[super viewDidLoad];

self.imageView.contentMode = UIViewContentModeScaleAspectFit;
self.imageView.image = [UIImage imageNamed:@"1.jpeg"];
hoge = 0;
// Do any additional setup after loading the view, typically from a nib.
}

- (void)didReceiveMemoryWarning
{
[super didReceiveMemoryWarning];
// Dispose of any resources that can be recreated.
}

- (IBAction)onClickButtonPicture:(id)sender {

for (UIView *view in [self.imageView subviews]) {
[view removeFromSuperview];
}

self.labelFaceWidth.text = @"";
self.labelFaceHeight.text = @"";
self.labelFaceX.text = @"";
self.labelFaceY.text = @"";
self.labelLeftEyeX.text = @"";
self.labelLeftEyeY.text = @"";
self.labelRightEyeX.text = @"";
self.labelRightEyeY.text = @"";
self.labelMouthX.text = @"";
self.labelMouthY.text = @"";

UIImage *image;

if (hoge == 0) {
image = self.imageView.image;
[self faceDetect:image];
hoge = 1;
} else if (hoge == 1) {
// 2.jpegに画像切替
image = [UIImage imageNamed:@"2.jpeg"];
self.imageView.image = image;
hoge = 2;
} else if (hoge == 2) {
image = self.imageView.image;
[self faceDetect:image];
hoge = 3;
} else if (hoge == 3) {
// 1.jpegに画像切替
image = [UIImage imageNamed:@"1.jpeg"];
self.imageView.image = image;
hoge = 0;
}
}

- (void)faceDetect:(UIImage *)image
{
// 検出器生成
NSDictionary *options = [NSDictionary dictionaryWithObject:CIDetectorAccuracyLow forKey:CIDetectorAccuracy];
CIDetector *detector = [CIDetector detectorOfType:CIDetectorTypeFace context:nil options:options];

// 検出
CIImage *ciImage = [[CIImage alloc] initWithImage:image];
NSArray *array = [detector featuresInImage:ciImage];

self.labelFaceWidth.text = @"***";
self.labelFaceHeight.text = @"***";
self.labelFaceX.text = @"***";
self.labelFaceY.text = @"***";
self.labelLeftEyeX.text = @"***";
self.labelLeftEyeY.text = @"***";
self.labelRightEyeX.text = @"***";
self.labelRightEyeY.text = @"***";
self.labelMouthX.text = @"***";
self.labelMouthY.text = @"***";

// 検出されたデータを取得
for (CIFaceFeature *faceFeature in array) {

self.labelFaceWidth.text = [NSString stringWithFormat:@"%f", faceFeature.bounds.size.width];
self.labelFaceHeight.text = [NSString stringWithFormat:@"%f", faceFeature.bounds.size.height];
self.labelFaceX.text = [NSString stringWithFormat:@"%f", faceFeature.bounds.origin.x];
self.labelFaceY.text = [NSString stringWithFormat:@"%f", faceFeature.bounds.origin.y];

float scale = 0.0f;

// 幅と高さの小さい方を把握
if (self.imageView.bounds.size.width < = self.imageView.bounds.size.height) {
// 幅の方が小さかった場合
scale = self.imageView.bounds.size.width / self.imageView.image.size.width;
} else {
// 高さの方が小さかった場合
scale = self.imageView.bounds.size.height / self.imageView.image.size.height;
}

float dispWidth = self.imageView.image.size.width * scale;
float dispHeight = self.imageView.image.size.height * scale;
float dispX = (self.imageView.bounds.size.width - dispWidth) / 2;
float dispY = (self.imageView.bounds.size.height - dispHeight) / 2;

float faceWidth = faceFeature.bounds.size.width * scale;
float faceHeight = faceFeature.bounds.size.height * scale;
float faceX = faceFeature.bounds.origin.x * scale + dispX;
float faceY = faceFeature.bounds.origin.y * scale + dispY;

UIView *hogeView = [[UIView alloc] initWithFrame:CGRectMake(faceX, dispHeight - faceY - faceHeight, faceWidth, faceHeight)];
hogeView.layer.borderWidth = 8;
hogeView.layer.borderColor = [[UIColor redColor] CGColor];
[self.imageView addSubview:hogeView];

if (faceFeature.hasLeftEyePosition) {

self.labelLeftEyeX.text = [NSString stringWithFormat:@"%f", faceFeature.leftEyePosition.x];

self.labelLeftEyeY.text = [NSString stringWithFormat:@"%f", faceFeature.leftEyePosition.y];

float x = faceFeature.leftEyePosition.x * scale + dispX;
float y = faceFeature.leftEyePosition.y * scale + dispY;

UIView* leftEyeView = [[UIView alloc] initWithFrame:CGRectMake(x - (faceWidth * 0.15), dispHeight - y, faceWidth * 0.3, faceHeight * 0.3)];
[leftEyeView setBackgroundColor:[[UIColor blueColor] colorWithAlphaComponent:0.8]];
[leftEyeView setCenter:CGPointMake(x + (faceWidth * 0.0365), dispHeight - y)];
leftEyeView.layer.cornerRadius = faceWidth*0.15;
[self.imageView addSubview:leftEyeView];
}

if (faceFeature.hasRightEyePosition) {
self.labelRightEyeX.text = [NSString stringWithFormat:@"%f", faceFeature.rightEyePosition.x];

self.labelRightEyeY.text = [NSString stringWithFormat:@"%f", faceFeature.rightEyePosition.y];

float x = faceFeature.rightEyePosition.x * scale + dispX;
float y = faceFeature.rightEyePosition.y * scale + dispY;

UIView* rightEyeView = [[UIView alloc] initWithFrame:CGRectMake(x - (faceWidth*0.15), dispHeight - y, faceWidth*0.3, faceWidth*0.3)];
[rightEyeView setBackgroundColor:[[UIColor greenColor] colorWithAlphaComponent:0.8]];
[rightEyeView setCenter:CGPointMake(x + (faceWidth * 0.0365), dispHeight - y)];
rightEyeView.layer.cornerRadius = faceWidth*0.15;
[self.imageView addSubview:rightEyeView];
}

if (faceFeature.hasMouthPosition) {
self.labelMouthX.text = [NSString stringWithFormat:@"%f", faceFeature.mouthPosition.x];

self.labelMouthY.text = [NSString stringWithFormat:@"%f", faceFeature.mouthPosition.y];

float x = faceFeature.mouthPosition.x * scale + dispX;
float y = faceFeature.mouthPosition.y * scale + dispY;

UIView* mouthView = [[UIView alloc] initWithFrame:CGRectMake(x - (faceWidth*0.15), dispHeight - y, faceWidth*0.3, faceWidth*0.3)];
[mouthView setBackgroundColor:[[UIColor purpleColor] colorWithAlphaComponent:0.8]];
[mouthView setCenter:CGPointMake(x + (faceWidth * 0.0365), dispHeight - y)];
mouthView.layer.cornerRadius = faceWidth*0.15;
[self.imageView addSubview:mouthView];
}

}

}
@end
11行目のviewDidLoad内で、とりあえず1番目の画像を表示させます。
27行目のonClickButtonPicture内で、ボタンのタップ回数に応じて、画像の切替/顔検出メソッドの呼び出しを行っています。
148行目のfaceDetectで実際に顔検出を行います。
顔検出自体は151行目から156行目で完了です。
156行目の配列arrayの中に顔データであるCIFaceFeatureが格納されます。
今回のアプリでは、取得した顔座標に丸やら四角やらを描画しようと思ったので、170行以降で座標に丸などを描画しています。
ここで1点ややこしかったのが、座標の開始位置です。
UIImageなどは左上が開始位置(0, 0)なのですが、顔データとして取得できるCIFaceFeatureでは左下が開始位置(0, 0)となっています。
そのため、UIImageViewに丸やら四角を描画する際に、座標の変換処理を行いました。
(多分、もっと簡単な変換方法があると思いますが・・・)
で、実際に動かした結果が以下になります。
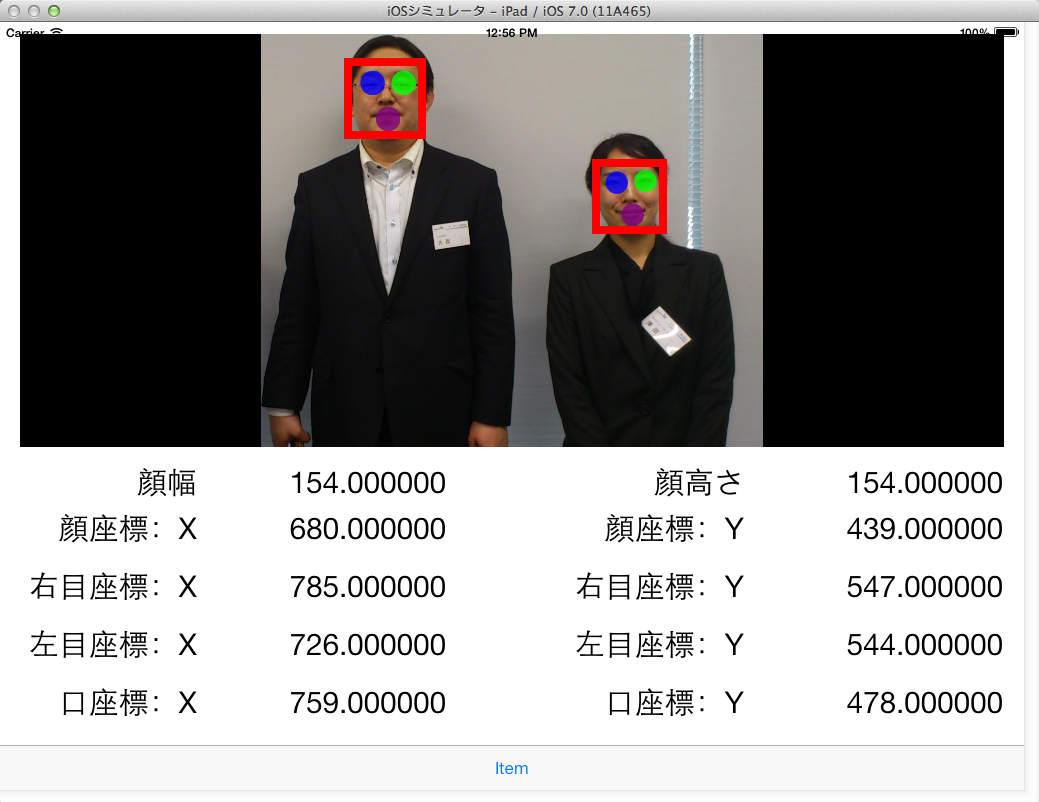
右目・左目・口の位置に丸を描画し、顔全体を矩形でかこってみました。
複数人数映った画像でも、各々の顔を検出できました。
また時間を見つけて、この辺りをもう少し詳しく調べてみようと思います。